
Growing
A DIY winter greenhouse for ₹5,000
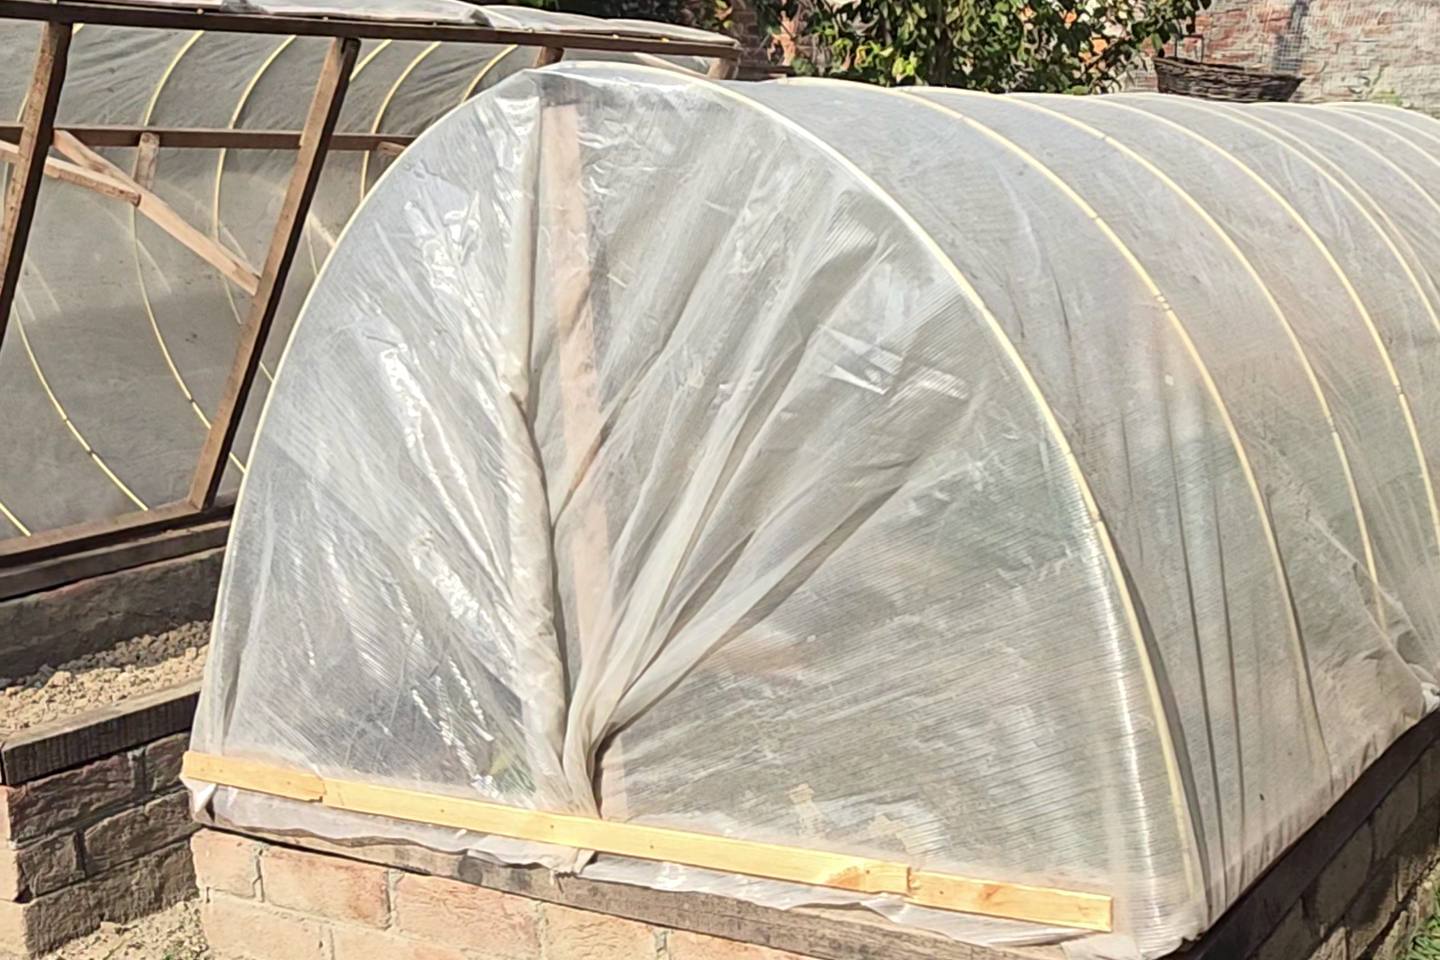
In short: This is a low polytunnel, 12 ft long and 4 ft wide, that sits on a brick raised bed and keeps my vegetables growing through a Kashmir winter. Nine hoops of bendable FRP pipe, a few lengths of timber and a sheet of polyfilm make the whole thing, and it cost me about ₹5,000. Below is how to build it, with drawings and every measurement, and an even simpler version that needs no timber at all.
What it is
Kashmiri winters are long and cold, with short days and long nights. If you want to grow vegetables all year, the usual answer is a greenhouse, and a ready-made one costs a lot. A low tunnel does that job for a single bed: clear film over a row of arches holds the day's warmth around the plants and keeps the worst of the wind, frost and snow off them.
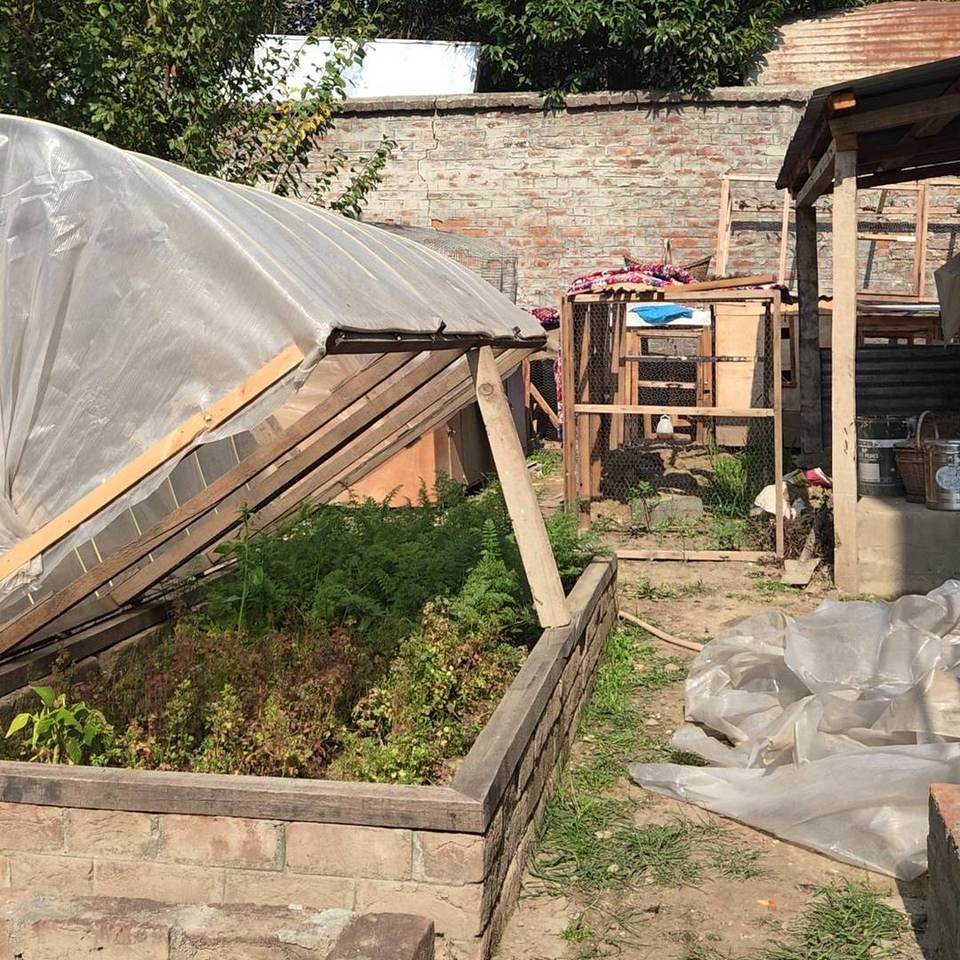
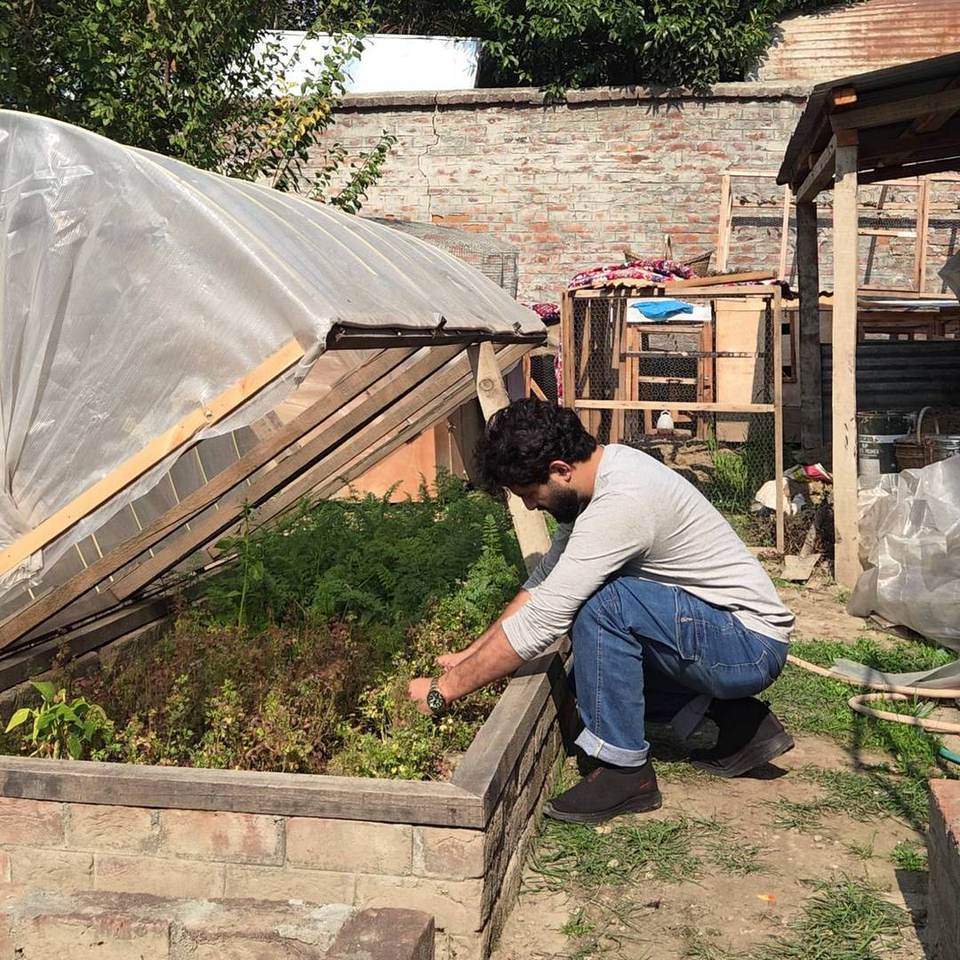
Mine comes in two parts. A light frame of FRP hoops and timber carries the film, and that frame is hinged to the wooden top of the raised bed, so the whole cover lifts open like a lid.
Why build this instead of buying a greenhouse
- Cost. About ₹5,000 for everything, in my case.
- No special tools. FRP pipe bends into an arch by hand and doesn't rust. Everything else needs a saw, a hammer and nails.
- Easy to work in. The lid lifts and stays propped open, so tilling, sowing and watering are no harder than on an open bed.
- Light. I lift the cover on my own, and the materials fit in a small vehicle.
It has limits. It's a low tunnel, so you work from outside it rather than walking in. FRP flexes, so heavy wet snow has to be brushed off. Polyfilm wears in strong sun over the seasons, so buy UV-stabilised film and expect to replace it one day.
What you need
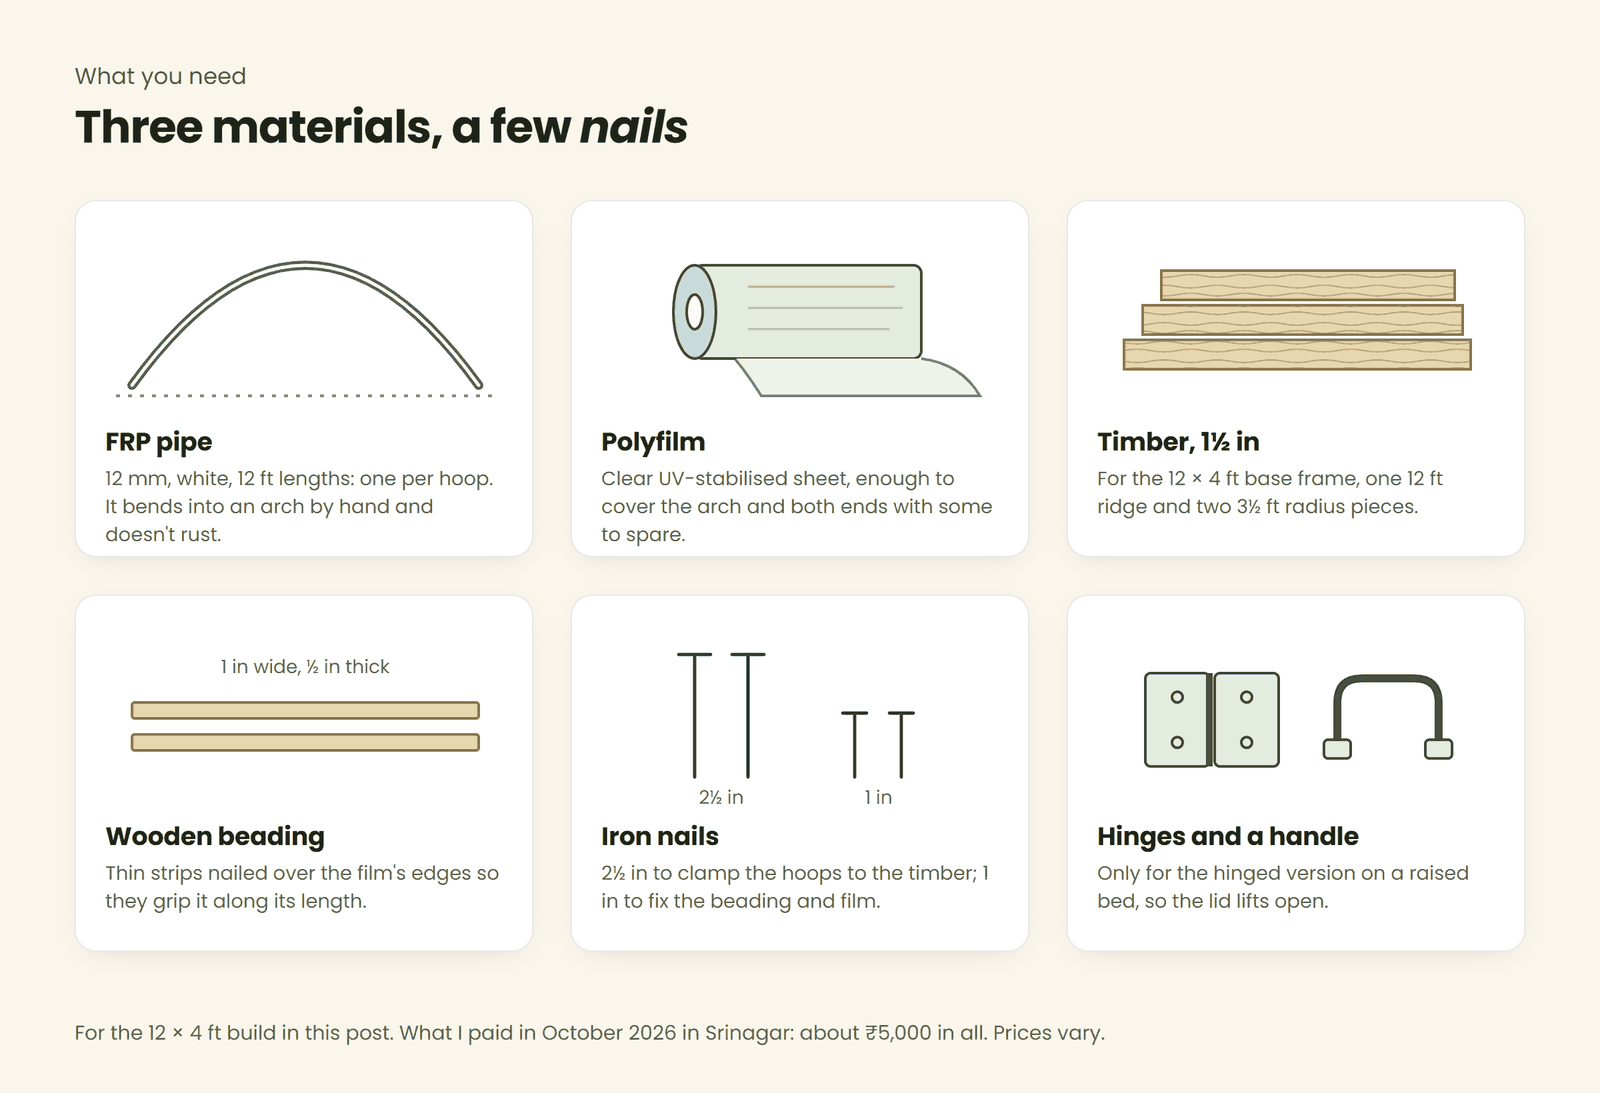
- FRP pipe, 12 mm, white and bendable, in 12 ft lengths. Each hoop is one whole 12 ft length, bent into a tall arch over the 4 ft frame, so nine hoops take nine lengths.
- Timber, 1½ in: two 12 ft and two 4 ft pieces for the base frame, one 12 ft piece for the ridge and two 3½ ft pieces to hold it up (I call them the radius timbers).
- Polyfilm, clear and UV-stabilised. To size it, measure over the arch from rail to rail and add a foot on each side, then add the arch's height plus 6 in at each end. For this build that comes to roughly 11 × 20 ft.
- Wooden beading, 1 in wide and ½ in thick, enough to run along both long sides and across both ends.
- Iron nails: 2½ in nails for clamping the hoops (two at every place a hoop crosses a 12 ft timber, so about 60 with spares), and 1 in nails for the beading.
- Hinges and door handles, only if you hinge it to a raised bed as I did.
What I paid in October 2026 in Srinagar: about ₹5,000 in all. Prices vary.
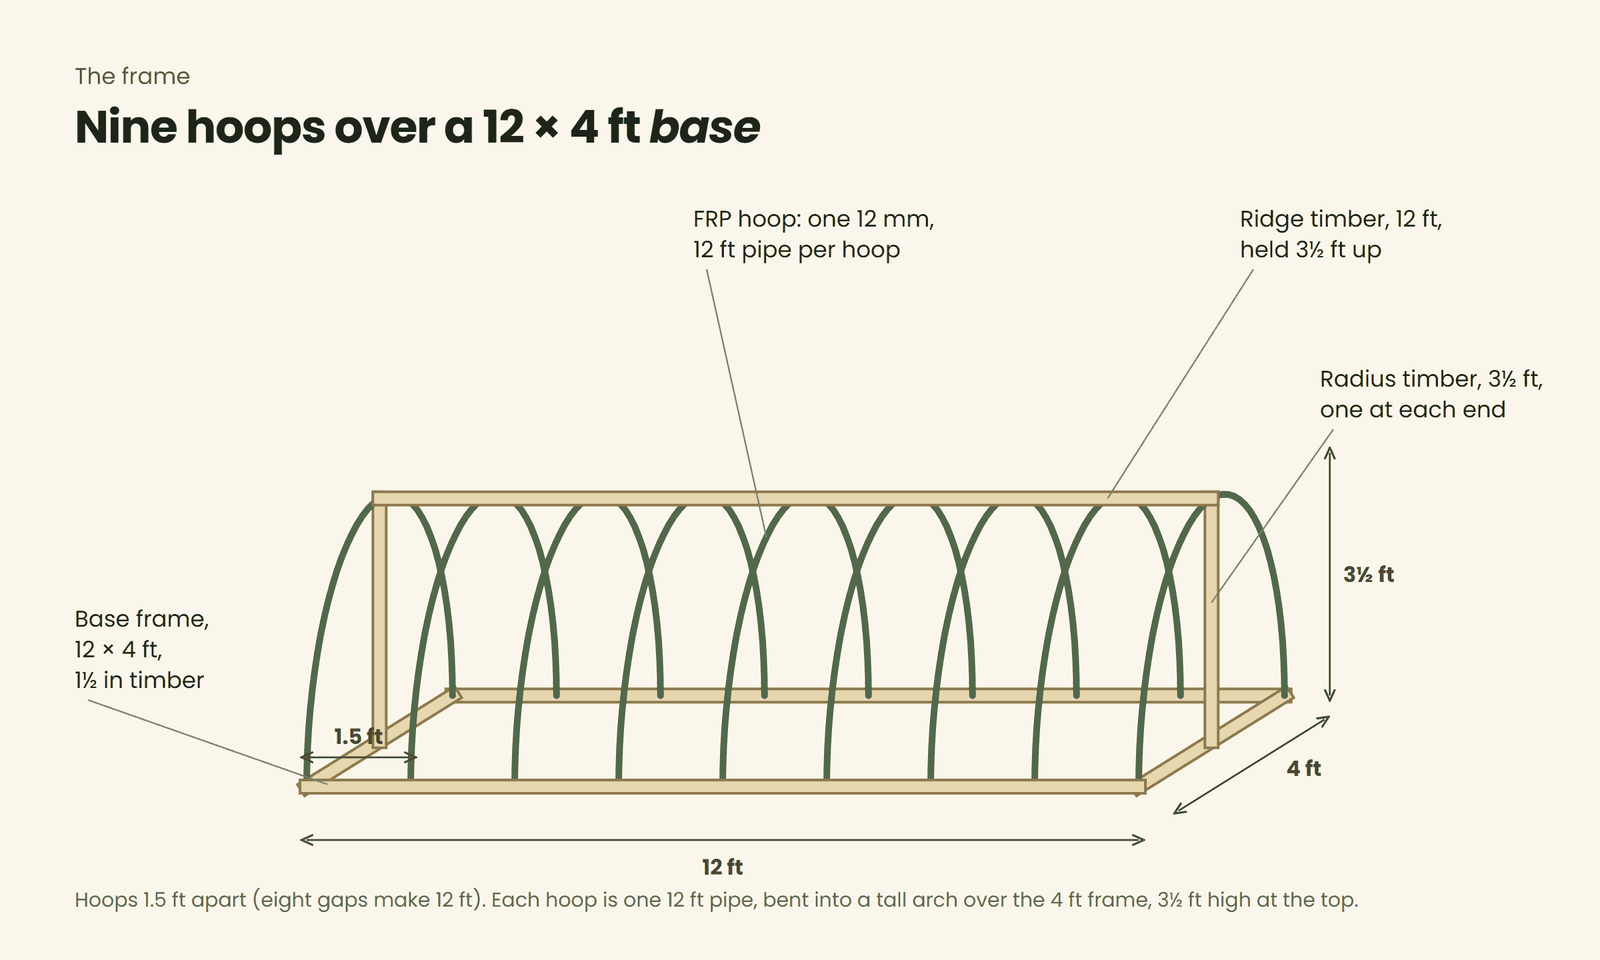
The frame at a glance
How to build it
1. Make the base frame
Nail the two 12 ft and two 4 ft timbers into a 12 × 4 ft rectangle. To check it's square, measure both diagonals: they should be the same length.
2. Mark where the hoops go
Along each long side, make a mark every 1.5 ft from one end to the other: at 0, 1.5, 3, 4.5, 6, 7.5, 9, 10.5 and 12 ft. That gives nine marks on each side, one for each hoop.
3. Put up the ridge
Stand a 3½ ft radius timber upright in the middle of each short end and nail the 12 ft ridge timber across their tops. The ridge now runs along the centre line 3½ ft up, which is where the top of each hoop will sit.
4. Bend and fix the hoops
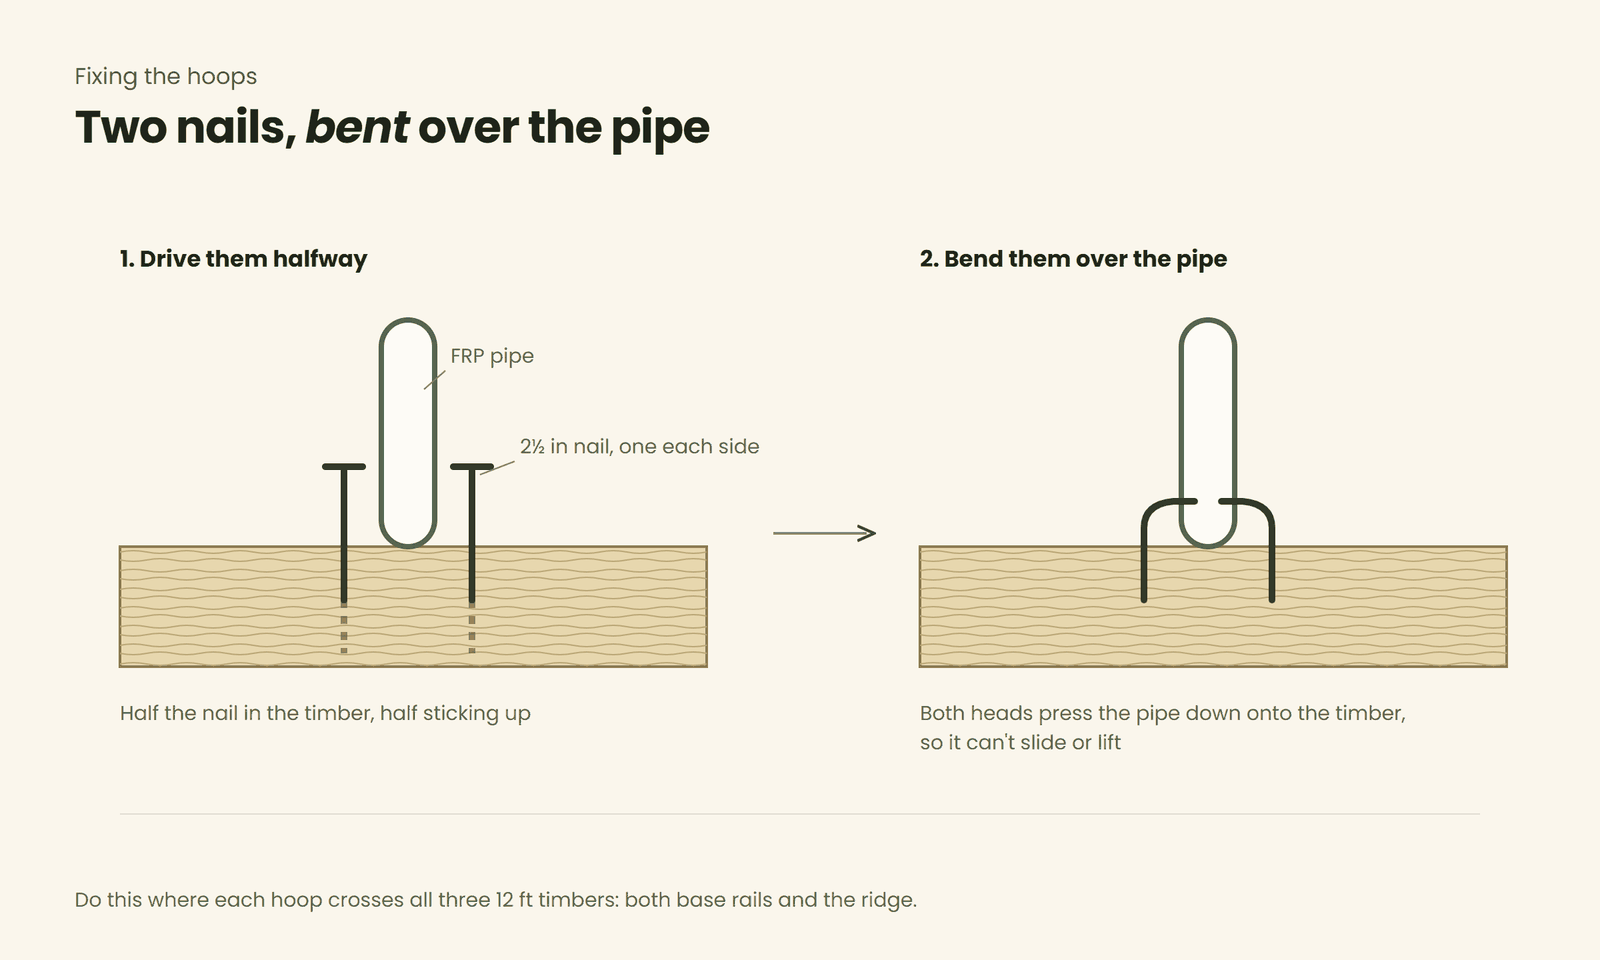
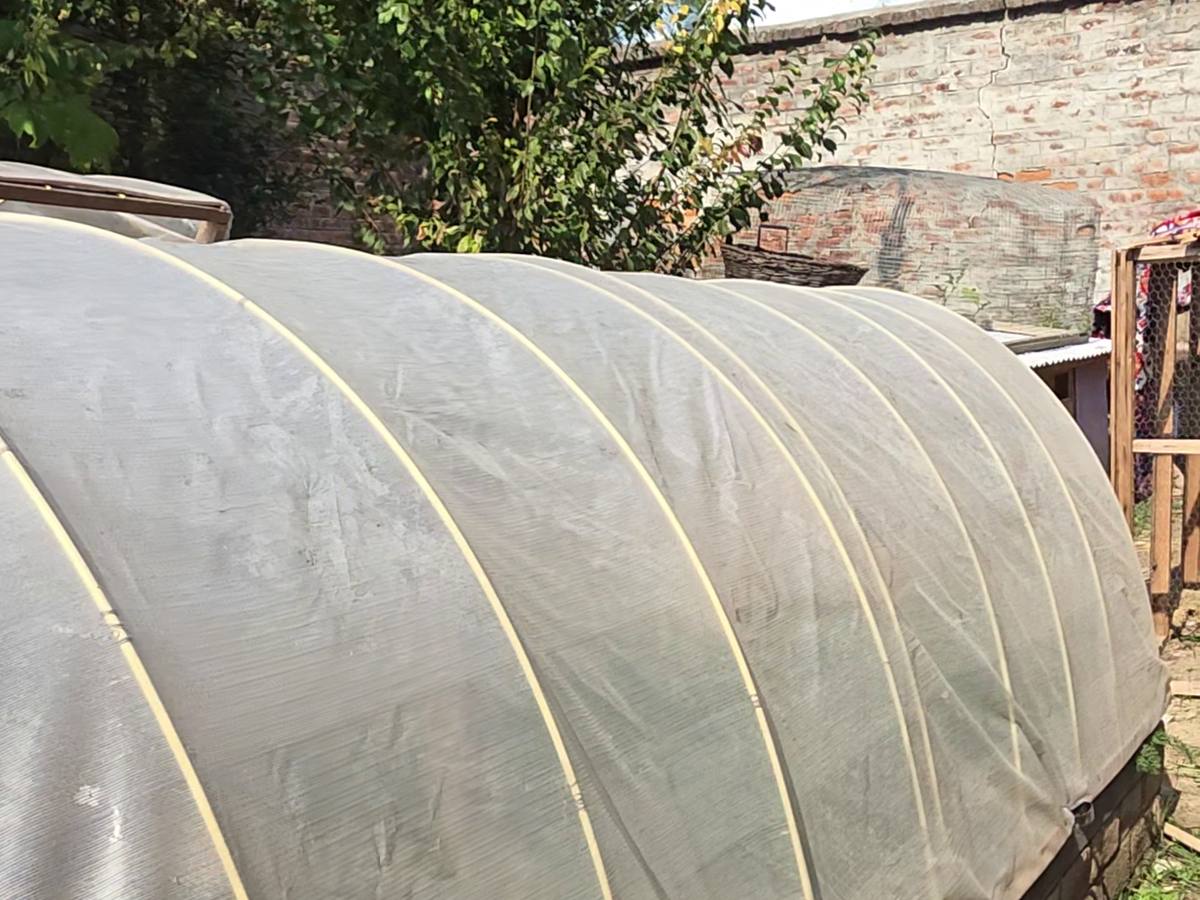
Each hoop is a whole 12 ft pipe. Fix one end at a mark on one long side, bend the pipe up over the ridge and bring it down to the matching mark on the other side. The arch comes out taller than it is wide, like a stretched half circle. Clamp it wherever it crosses a 12 ft timber (both long sides and the ridge) with two 2½ in nails: drive one halfway in on each side of the pipe, then bend both heads over the pipe so it can't slide or lift. Repeat for all nine hoops.
5. Cover it with polyfilm
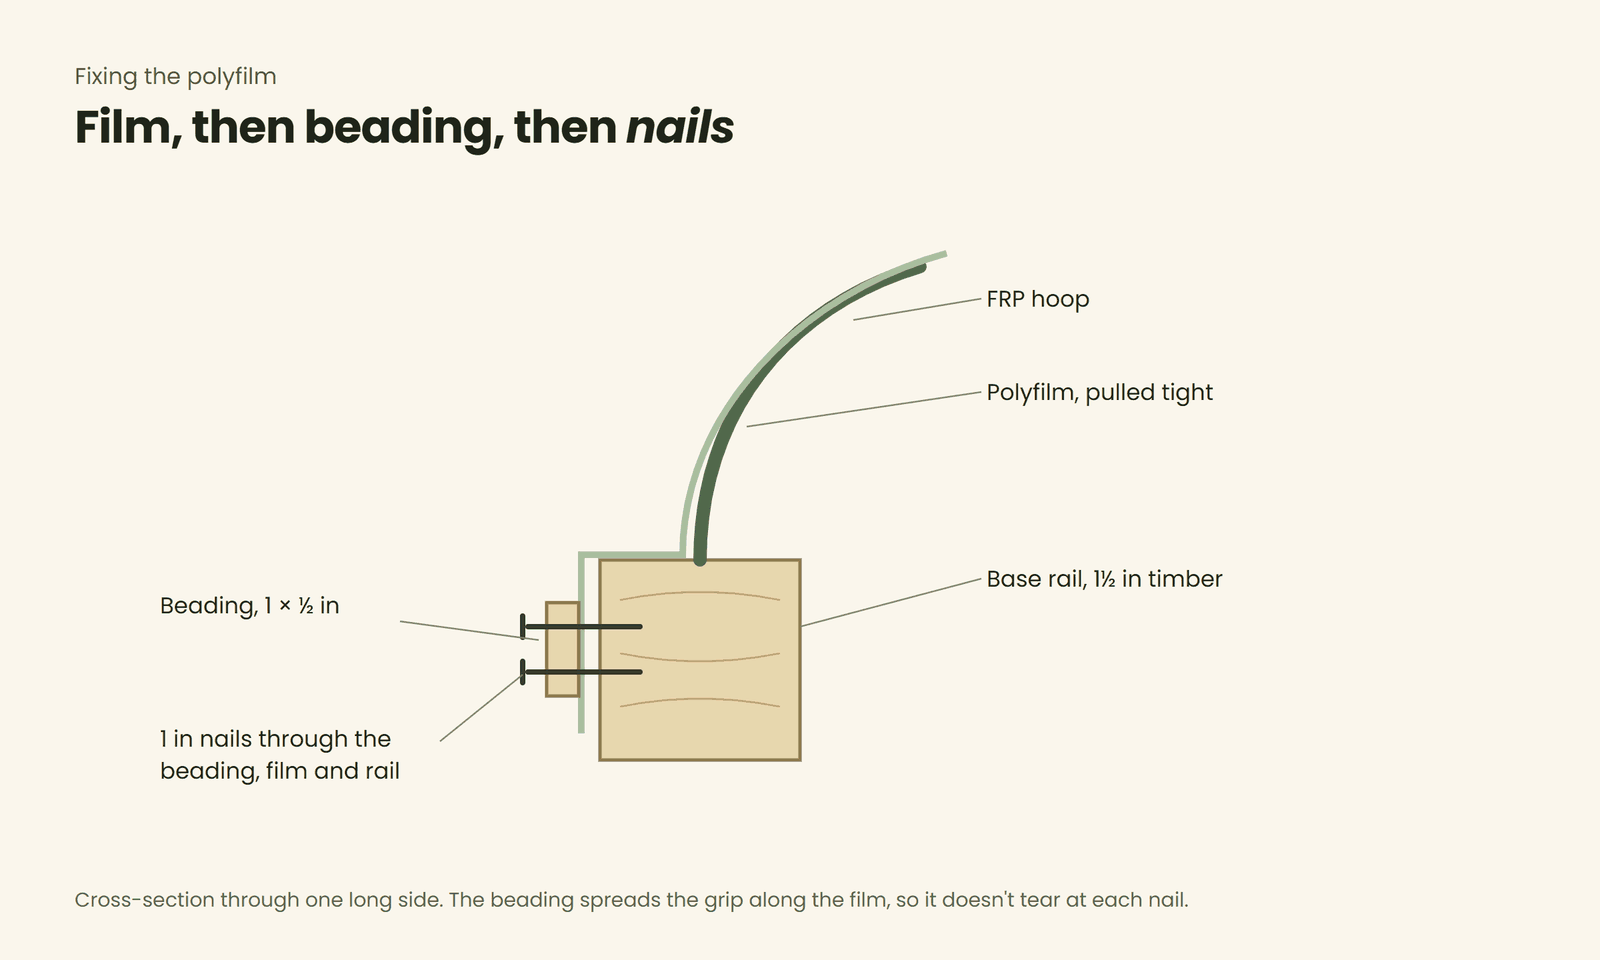
Lay the film over the hoops and pull it tight. Slack film flaps in the wind, tears where it rubs on the hoops and holds snow in pockets. Lay a strip of beading over the film along each long side and nail through the beading, the film and the timber with 1 in nails. The beading spreads the grip along the film, so it doesn't tear at each nail. Then fold the film down over both ends, gather it around the radius timber and fix it with beading and nails in the same way.
Before the film goes on, wrap the top of each hoop in tape or an old strip of cloth. The film rubs there in the wind and this keeps it from wearing through.
6. Hinge it to the bed (my version)
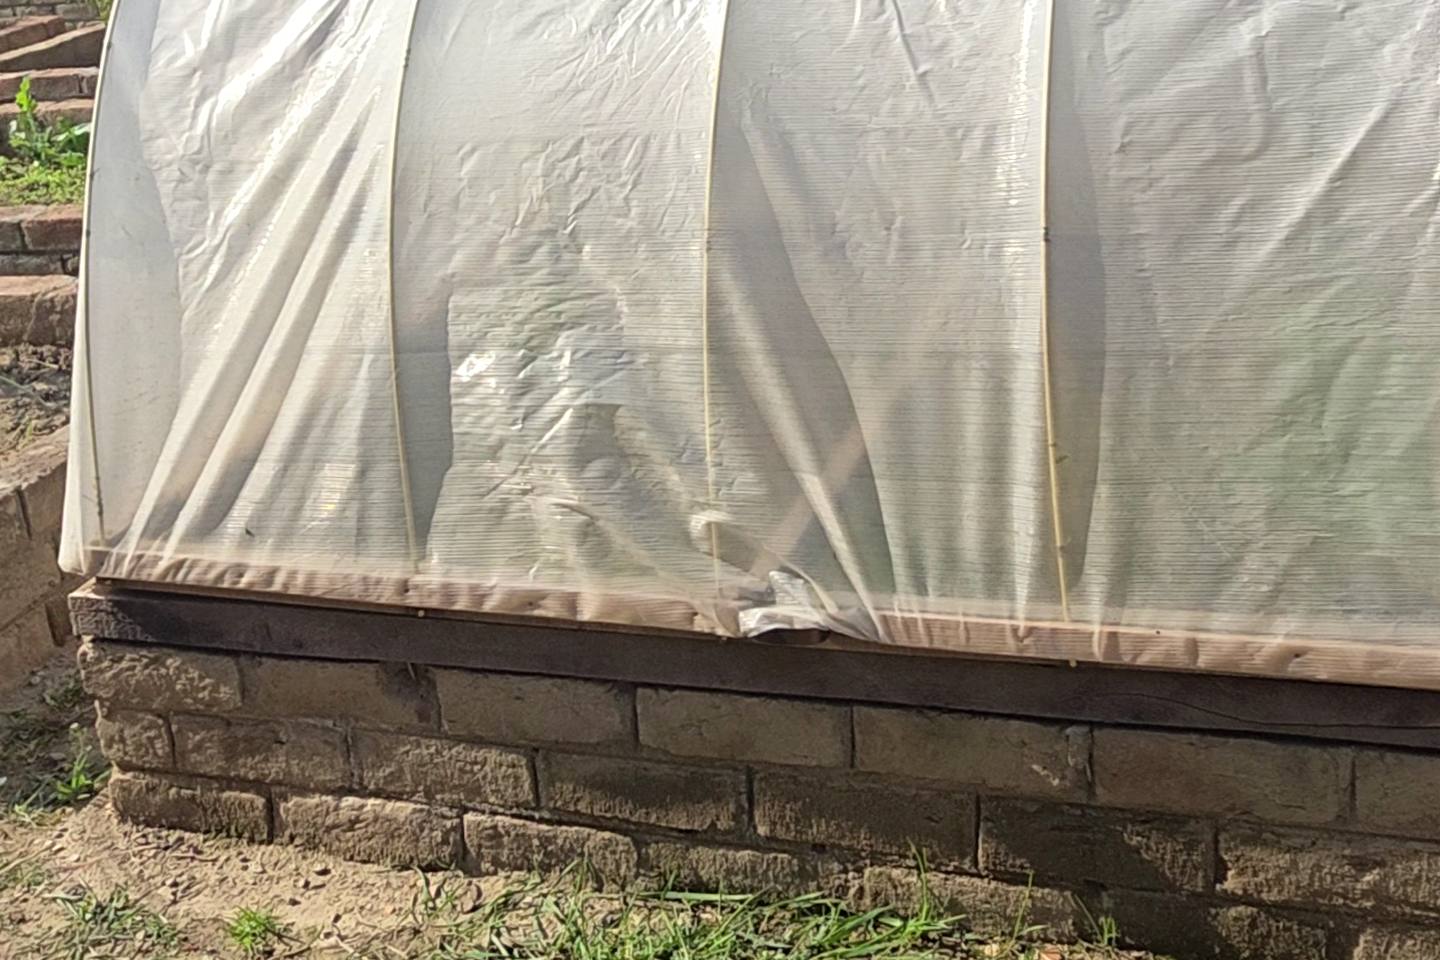
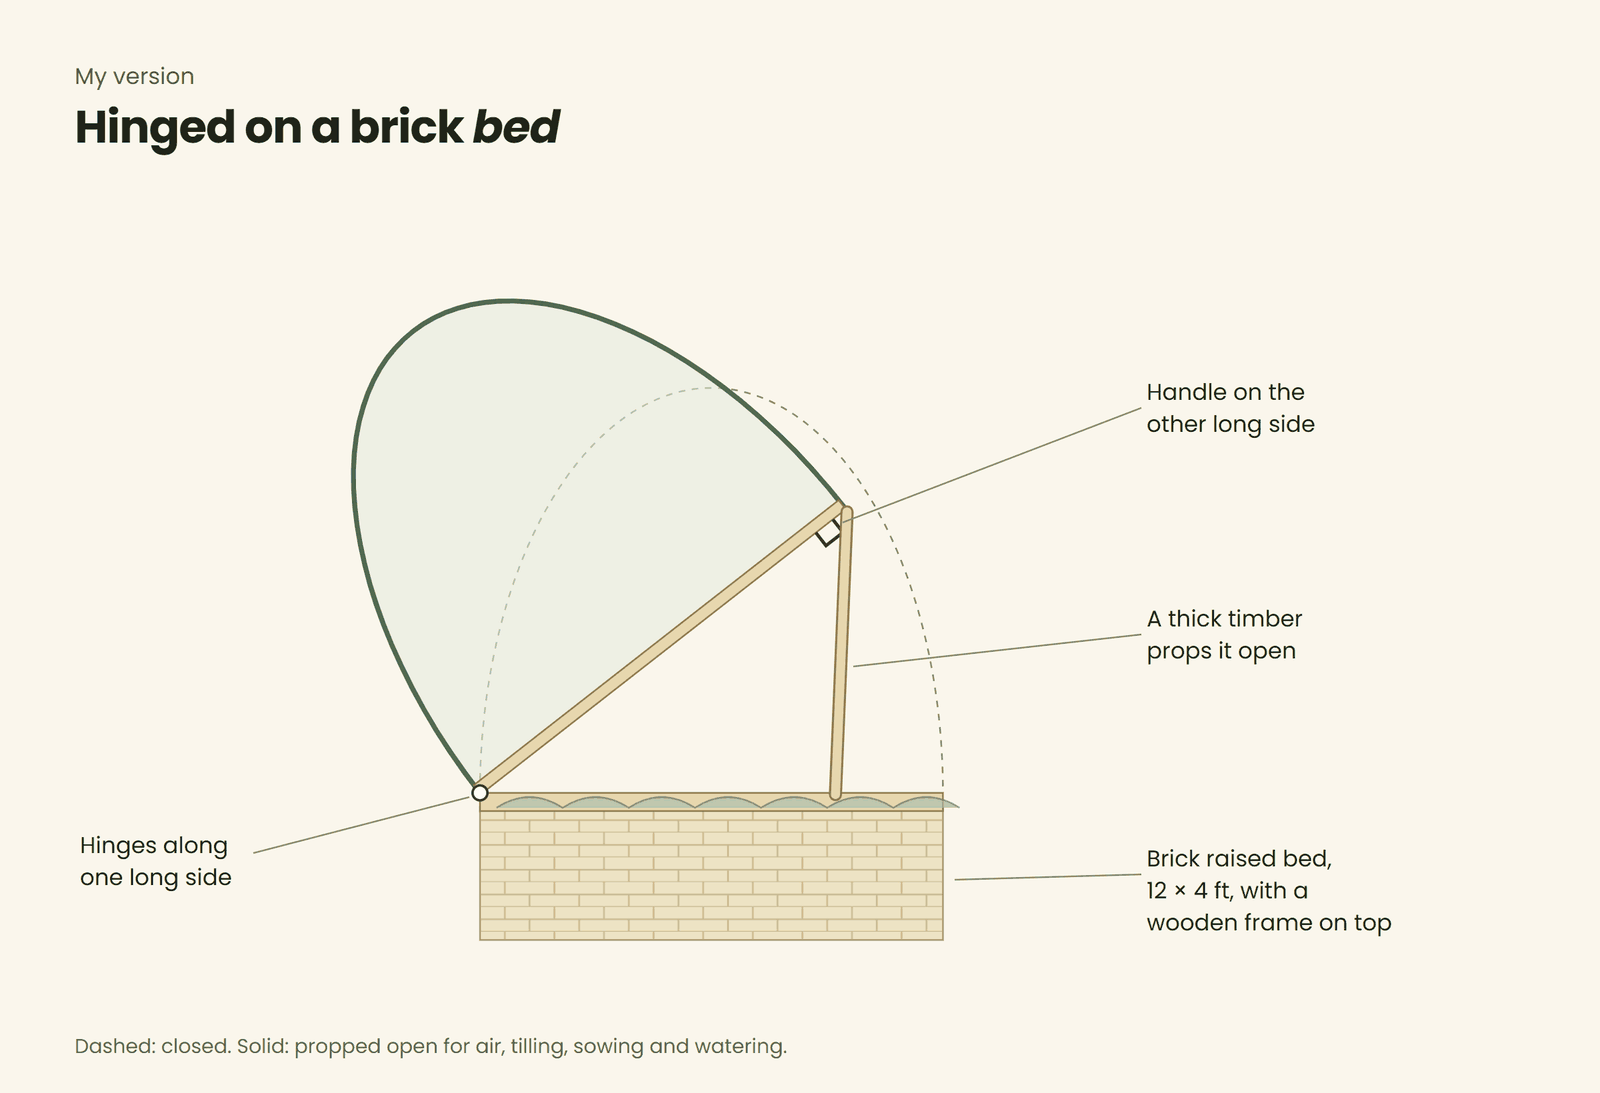
My tunnel sits on a 12 × 4 ft raised bed made of bricks, with a wooden frame along its top. I fixed the tunnel's base frame to that wooden frame with hinges along one long side and put door handles on the other. Lifting by the handles opens the whole cover, and a thick piece of timber wedged underneath holds it open for airing, tilling, sowing and watering.
The simplest version: no timber at all
If your bed is in the ground, you can skip the frame. Push one end of a 12 ft FRP pipe about 1 ft into the soil, bend it over and push the other end 1 ft in on the far side. That makes an arch roughly 6½ ft wide and 3 ft high. Make more arches the same way, about 1.5 ft apart, lay one sheet of polyfilm over all of them, and hold its edges down with soil along both sides.
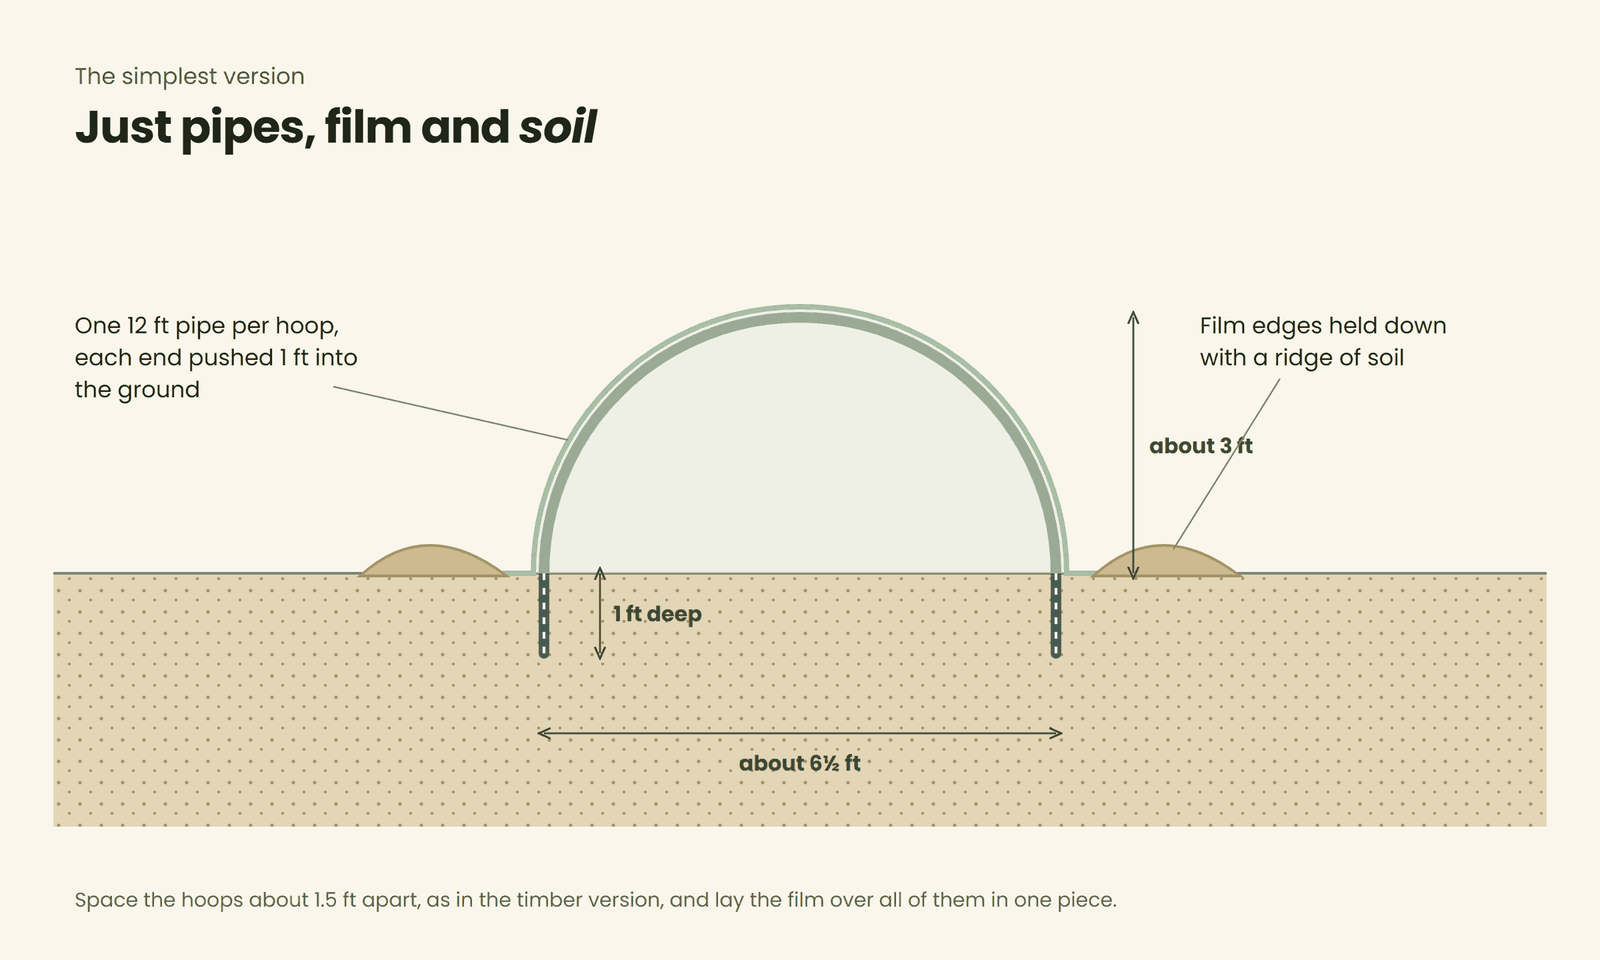
It goes up faster and costs less. There's no lid, though, so to work the bed you lift the film's edge out of the soil.
Looking after it through winter
- On sunny days, open it for a few hours around midday, even in winter, and close it by mid-afternoon to keep the warmth in for the night.
- Water in the morning. Damp leaves and dripping condensation overnight encourage fungal disease.
- Brush snow off gently after each fall. Never lean on the tunnel or put weight on it.
- If you can, face one long side south for the most winter sun.
Cold-hardy crops suit it best: spinach, haakh, lettuce, mustard greens, radish and turnip. Tomatoes, chillies and cucumbers need more warmth than an unheated tunnel gives in winter.
Watch the build
This is the full build I promised in the reel. If you came here from Instagram or YouTube, thank you for watching. You can play it again here, or open it where you found it.
For more builds and winter growing from Srinagar, follow @theorganicrevival on Instagram and subscribe on YouTube.